Creating a custom support ticket pipeline integrated with Slack – no code required

Good customer support hinges on having an easy way for your client to communicate with you, and on your ability to follow through with requests or bug reports. Too often companies implement chats and other quick channels to solve the former, but fail to have good processes for the latter. Usually, one of the culprits for a ticket getting lost is the lack of good communication between teams.
We’ll teach you how to send automatic Slack messages directed at specific teams so you don’t have to worry about this problem anymore.
Platforms used:
Time to build the tool ⏱:
- 2min 24sec on average.
Costs to test ?:
- Slack ($0 With 10k searchable message) + Jestor ($0 under 200 actions/mo) = $0.00*
*costs may vary according to different providers pricing changes.
4 Steps to Create a custom support ticket pipeline integrated with Slack
1. Create your Support pipeline.
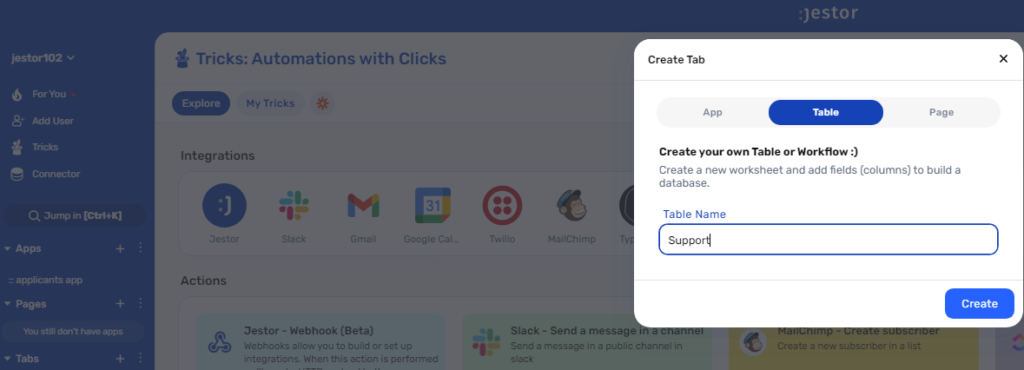
Create a table in Jestor, name it “Support”, and add all the fields you’ll need for the process. For example, you’ll usually need a short description, priority and team responsible for solving the problem (such as Tech or Billing). Create a single select field for Status, such as New and Pending, then click on “Flow” to activate a workflow view. Now, you have a visual representation of the process, and can basically drag the cards along as you work on them.

2. Create your automation.
Open the tricks panel (by clicking on the bunny in the hat icon) and create a new trick. Give it a name and description so you can later identify this trick should you need to edit or deactivate it.
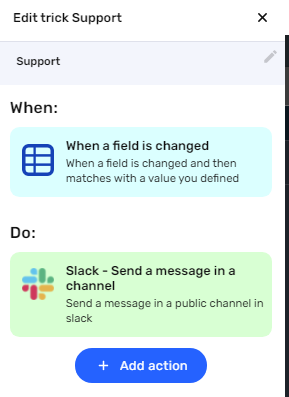
In this automation, we’ll send a Slack message directed to a specific team after the tickets have been analyzed and moved to Pending. So, as the trigger for this automation, select When a field is changed, choose the “Support” table, as a condition choose the field Status, then write “Pending”.

3. Set up a Slack notification.
Choose the “Slack – Send a message in a channel” action. Connect your Slack account and choose the channel the alert will be sent to. Now, type in the message that you want to receive by using a mix of fixed text and dynamic information.
We’ll go with: “New ticket pending: {{name}} | Team: {{team}} | Priority: {{priority}}”
4. Test your automation to make sure everything is working as planned.
Create a new ticket with random information. Now, move the card to the “Pending” stage. If you’ve set up everything right, you should have received a Slack message with the info from your ticket. You can do this again with other information to see how the information changes dynamically!
And there you go! You can do this for different statuses, and even mix other tricks such as sending emails or text messages to improve the process. But, with only the steps above, you can make sure every triaged ticket gets sent to the correct team: no information breakdown means better customer experience!
What’s Jestor?
Jestor is a no-code tool to build scalable internal systems, fast. You can create apps, automations, workflows and databases tailor-made for your company. Unlimited users, records, apps and automations. Try it for free here ?

